Table of Contents
In this article, I will take you through 5 Easy Steps to Install Openssh-Server on Ubuntu 20.04 to enable ssh. Today I was trying to setup Ubuntu 20.04 to perform certain tasks by login to the Server through putty using ssh protocol but was unable to connect to the Server after repeated attempts. Then I noticed that ssh service is not available in a freshly installed Ubuntu 20.04 Server.
Hence I needed to install openssh-server package from Ubuntu repository to enable ssh in my Server. I am sure many of you might be also facing the same issue so I thought to put together all the steps required to install openssh-server. This will help you enable ssh service on your Server in case you are facing the same issue.

Install Openssh-Server on Ubuntu 20.04 to Enable SSH
Also Read: 15 Practical Bash For Loop Examples in Unix/Linux For Professionals
Step 1: Prerequisites
a) You need to have a running Ubuntu 20.04 Server.
b) You should have apt tool installed in your Server. To Know more about apt-get tool, you can check 20 Useful apt get examples on Ubuntu.
c) You should have sudo access to run Privilege Commands. Please Check How to Add User to Sudoers to know more about providing sudo access to the User.
d) We are using below IP Address and User to login to the Ubuntu 20.04 through Putty.
Server IP : 192.168.0.103
User: test
Server Type: Virtual Server
Step 2: Update Your Server
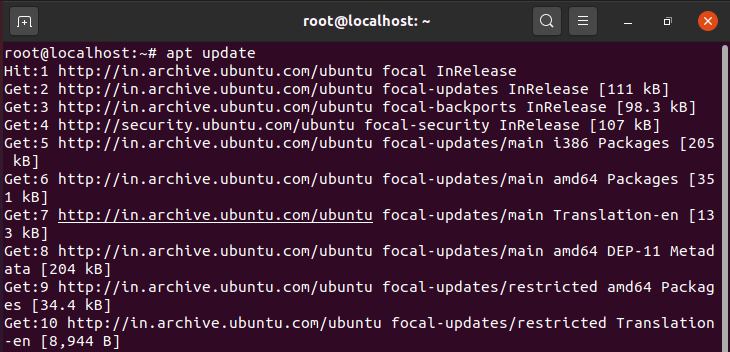
Before going through the steps to install openssh-server package in your Server, you need to first update your Server with the latest updates using apt update command as shown below. Since I have already logged in and switched to the root user account so I am using this command. Otherwise you can also use sudo apt update command to update your packages in case you want to run the command through non-root user.

Step 3: Install Openssh-Server on Ubuntu 20.04
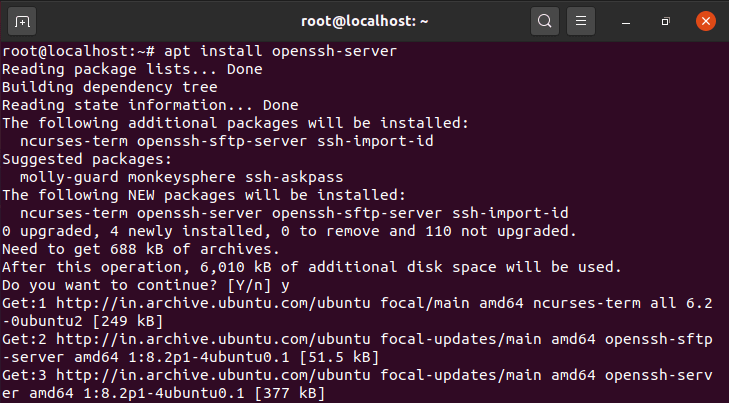
After successfully updating the System you can install openssh-server package using apt install openssh-server command as shown below. This command will build the dependency tree and find all the dependent packages that needs to be installed along with openssh-server package from Ubuntu Repo.

Step 4: Check SSH Service status
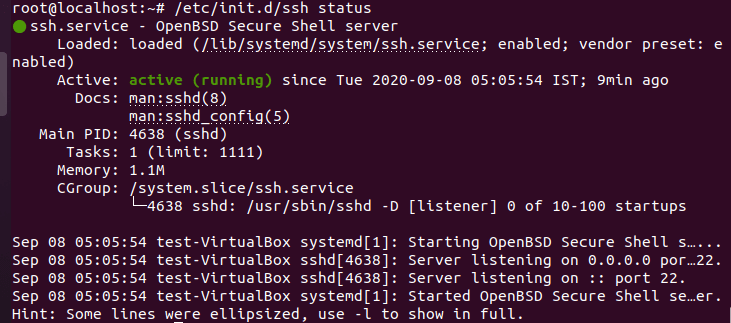
Once openssh-server package is installed in your Server, you can now see ssh service available under /etc/init.d directory. Now you can check the status of ssh service by using /etc/init.d/ssh status command as shown below.

Step 5: Login to Ubuntu 20.04 Using ssh Port 22
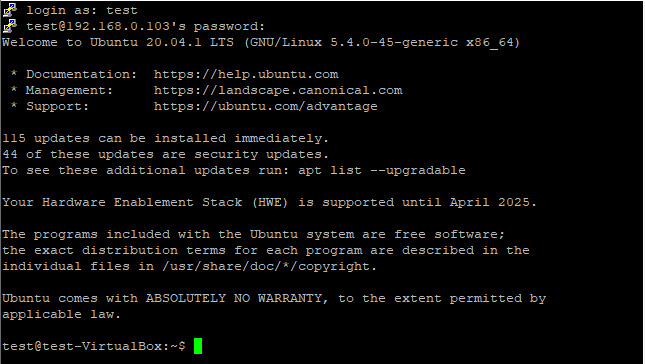
Now if you try to connect your Ubuntu 20.04 Server using ssh port 22 then you should be able to connect just like the way it is shown below.
In case if you are still not able to connect then i would suggest you to check and perform below steps :-
a) Check your /etc/ssh/sshd_config file and make sure Port 22 Line is uncommented there. If it is not uncommented, then you can uncomment it and restart the ssh service by using systemctl restart ssh or by using /etc/init.d/ssh restart command.
b) Make sure ssh is allowed from ufw firewall if you are running this firewall. If it is not allowed then you need to allow it and then try again to ssh the Ubuntu 20.04 Server. It should work.

Recommended Posts:-
10 Useful iproute2 tools examples to Manage Network Connections in Linux
6 Popular Methods to List All Running Services Under Systemd in Linux
Unix/Linux Find Files and Directories Owned By a Particular User(5 Useful Examples)
33 Practical Examples of ulimit command in Linux/Unix for Professionals
Install Node.js in 6 Easy Steps on Ubuntu 18.04
How to Install NVM for Node.js on Ubuntu 18.04
How to Limit CPU Limit of a Process Using CPULimit in Linux (RHEL/CentOS 7/8)
How to Install Rust Programming Language in Linux Using 6 Best Steps
Bash For Loop Examples to Check Processes using Swap Memory in Linux
